Results 21 to 35 of 35
Thread: Transmission Removal - Part 1
-
05-23-2011, 04:17 PM #21
Subscribed cuz my ugly mug is in there.
-
05-23-2011, 07:58 PM #22
Transmission Installation - Part II
I'll start by pointing out that some of the pics of the transmission going back into the car were taken during the first attempt. The process was identical both times, so other than a properly seated torque converter there were no differences. Raising the transmission up between the headers and Y-pipe it has to be turned so that the tailstock will clear the junction of the Y. Once it is past this point, it can be aligned with the center axis of the car and then raised up into its approximate final position. As the jack is rolled forward to close the distance, the transmision is tipped utilizing the adjustable jack platform so that it is parallel to the engine block. The dip stick tube was guided into its seal as the transmission was raised. Once the dowel pins made contact a few more minor tweaks mated the transmission in place.
I immediately checked the torque converter to ensure that is spun freely and was set back from the flex plate approximately 1/4", which was the correct distance. Anti-seize was applied to the bolts and they were inserted and ran in until they each loosely contacted the bell housing. Two of the upper bolts had to be inserted with a swivel socket as there is simply no way to reach your hand up there with the transmission in place. After all the bolts were in they were torqued to spec and the rear crossmember was then installed with a new polyurethane transmission mount. At this point, the jacks were removed and work began on installing the remaining items.
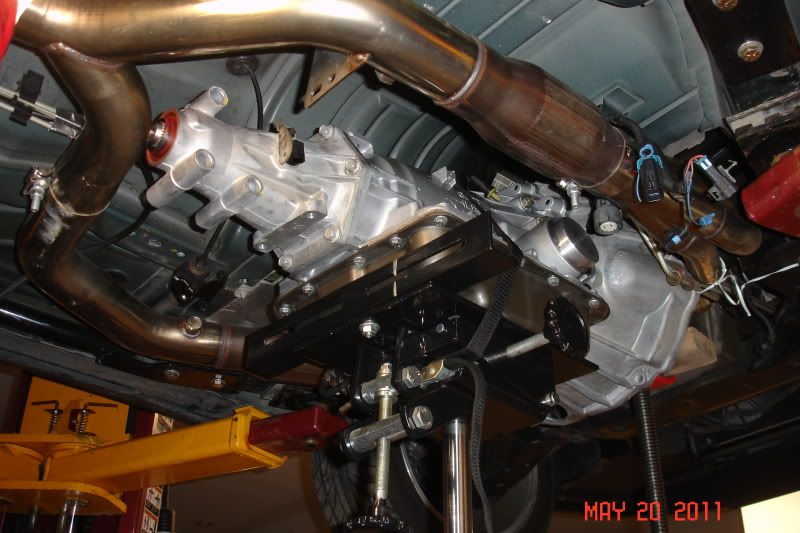
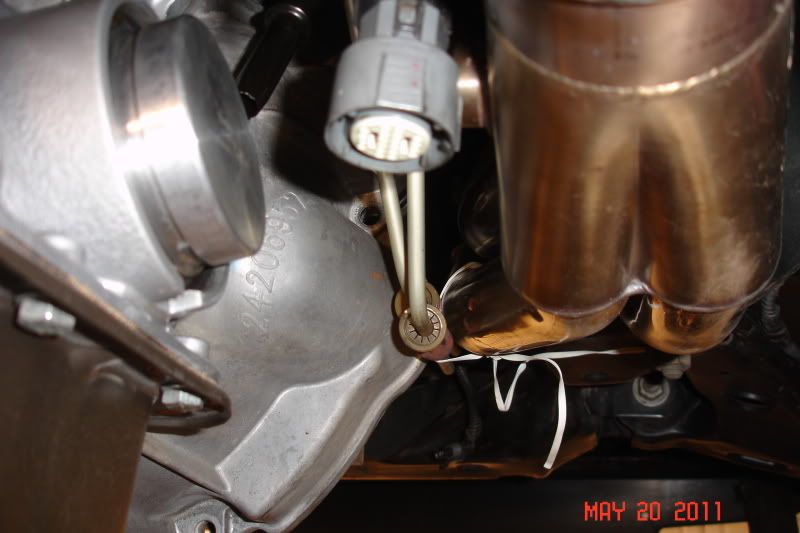
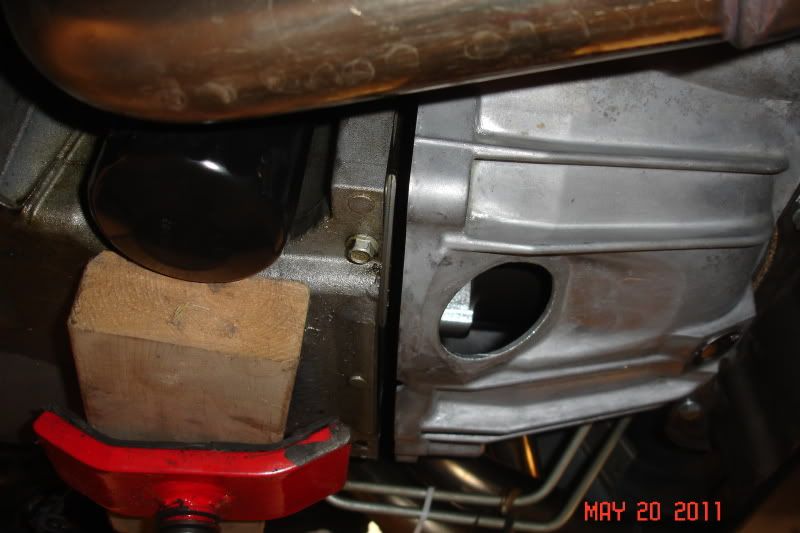

There are three (3) bolts that connect the torque converter to the flexplate. One of the holes in the flexplate is rectangular and this is the one to start with. I had previously rotated the engine after its installation to place this hole in the opening where the starter will be installed. As with the flexplate bolts, I utilized ARP bolts for the torque converter. The bolts were first degreased to remove any oily residue and then medium strength Loc-Tite was applied. Reaching through the torque converter access holes, I pulled the converter forward until it contacted the flexplate and then installed and torqued each bolt. As with removal, I found the best access to be over the K-member with a long extension. Again, the balancer bolt was utilized to roll the engine over as each bolt was installed. I then replaced the plastic torque converter covers and re-installed the starter.
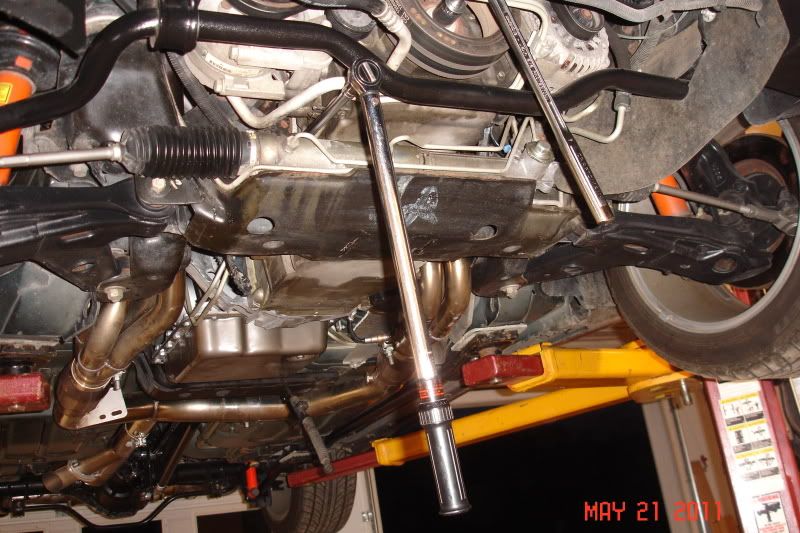
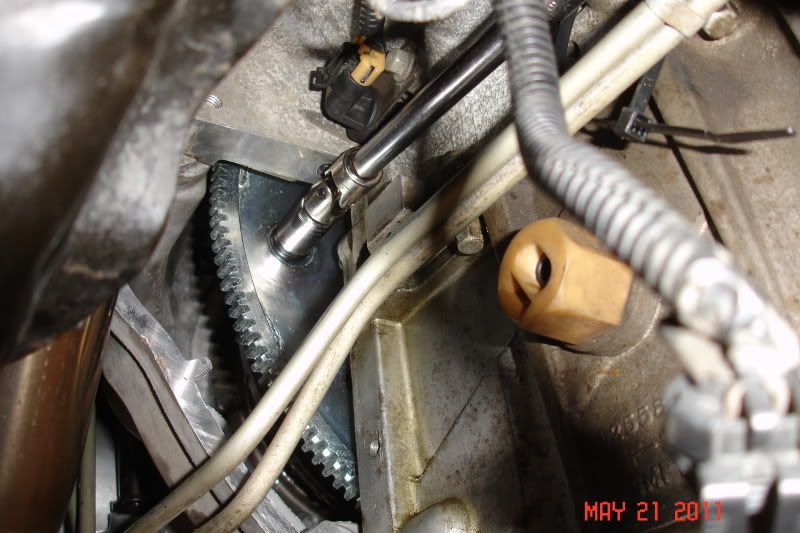

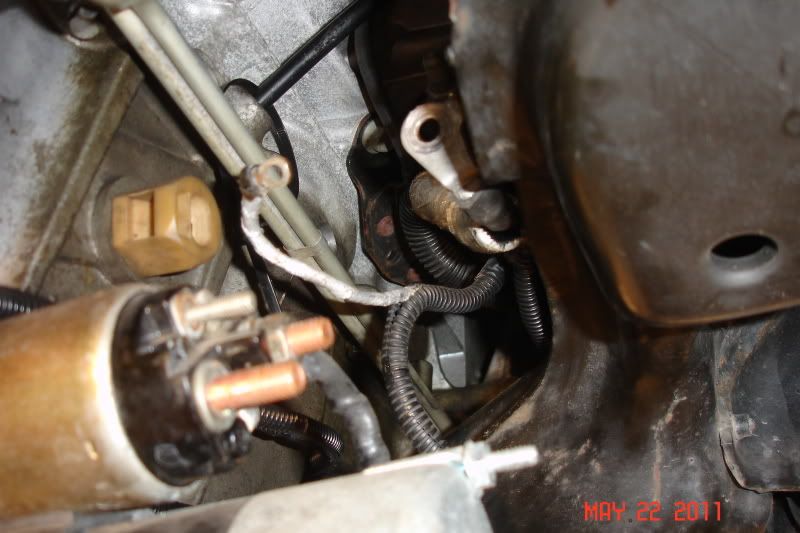
The transmission cooler lines were installed with new clips. The lines are pressed into the fittings until they click. The clips are just a bit tricky to install -- an end of the clip must be inserted into the slot on the fitting and then rotated around the fitting until all three detents are engaged. The clip can not be simply pressed into place. Plastic covers and a retainer are then snapped and slid in place to ensure that the clips cannot work themselves loose. The wire harness is then connected and the harness clamp bolted to the passenger side of the transmission. I omitted the driver side clamp as I do not run rear O2 senders in our car and the harness is simply tied off.
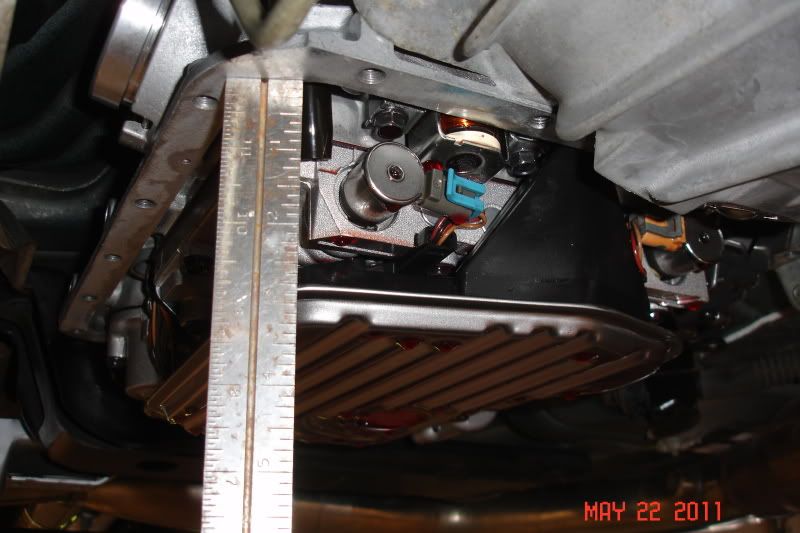
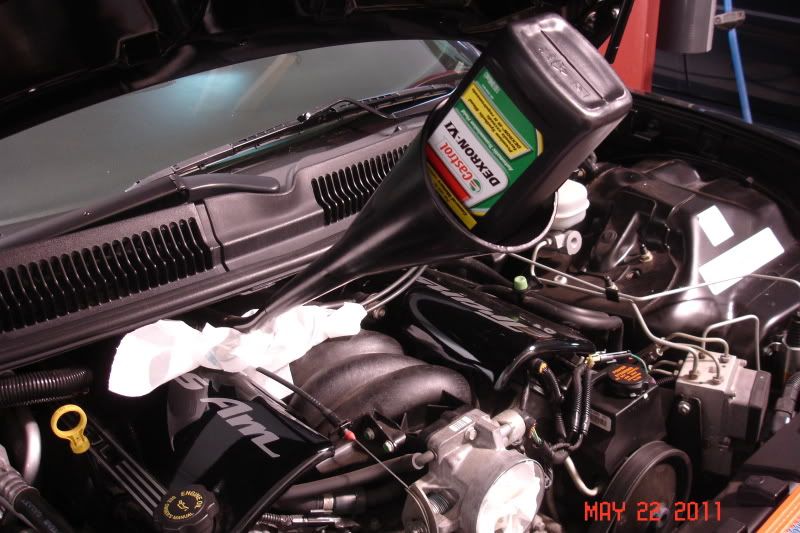
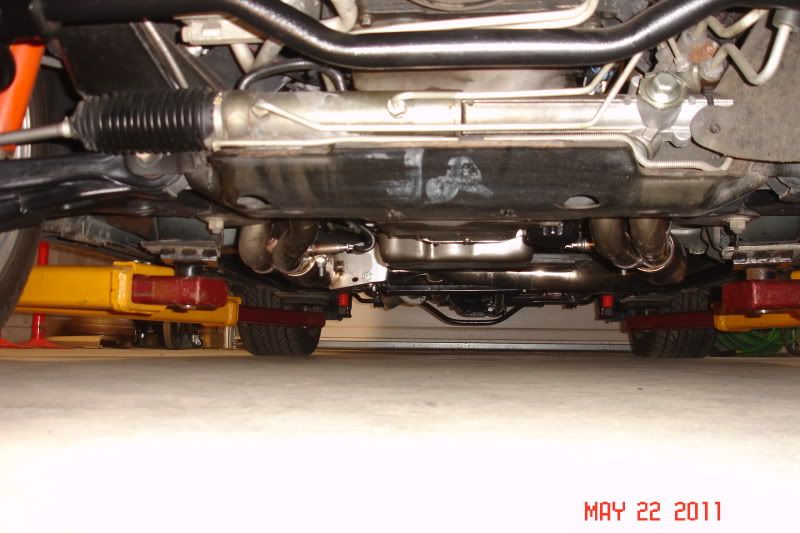
After buttoning up the heat shields, exhaust, and installing the driveshaft, I dropped the transmission pan to ensure that it had a deep filter installed. I had requested a deep pan for extra fluid capacity and also the fact that it includes a drain plug. The deep pan is approximately 3-1/4" so the filter was spot on at 3" off the bottom of the transmission. I also replaced the cork gasket with a Fel-Pro piece. As explained by Performabuilt, they do this on purpose as the cork gasket will eventually start weeping fluid and will force you to change it. This ensures that the fluid will be changed at least once. That is not a concern for me as I always abide by maintenance schedules and simply do not like anything that leaks. After installing the pan, the shift cable and front O2 senders, I dropped the car back down and poured in six (6) quarts of fluid in accordance with the instructions. I also checked my ground clearance with the deep pan and it does not appear to be an issue. Note that our car is not lowered and in the pic it is still partially supported by the lift arms.
-
05-24-2011, 11:01 AM #23Four Seat Vette


- Join Date
- Oct 2009
- Location
- pasadena md
- Posts
- 2,034
- Blog Entries
- 2
Black- 2002 SS Camaro
How about a spin around the block now, good write up
-
05-25-2011, 06:28 PM #24
I pushed the passenger side dowel into the transmission with my air chisel. For a while there I wasn't exactly sure what to try as I was afraid of damaging the bell housing.
Yes, it is. Thanks again for the help!
Took a short ride last night. I need to check my tune for the converter lockup settings and shift points as the converter was locking and unlocking at odd times.
-
05-30-2011, 05:55 PM #25
Sent a PM to Frost concerning the issues. I feel pretty stupid right now for not thinking this one through.

With the mail order tune last year, Frost modified the transmission settings as my driveline had been beefed up. This included raising the line pressures. The new Performabuilt transmission comes with a modified valve body and pump which results in the pressures being increased mechanically. Therefore, I was essentially getting a "double whammy" and who knows what for line pressure on my shakedown cruise.
I have sent my current tune to Frost for revamping. I assume he will return the line pressure settings back to stock and make a few more tweaks while working his magic. Then we'll try this again.
-
05-31-2011, 09:08 AM #26Four Seat Vette


- Join Date
- Oct 2009
- Location
- pasadena md
- Posts
- 2,034
- Blog Entries
- 2
Black- 2002 SS Camaro
Damn that sucks, what ended up happening because of that
-
05-31-2011, 09:21 AM #27
-
10-08-2011, 12:51 PM #28
The new transmission and converter has worked flawlessly since installation. We haven't put all that many street miles on it, but we have been to the track three times now. I had read on here before the installation that a good converter will drop your track times by about 0.5 second and that is almost exactly what I have experienced. From a best last year of 12.885, our car ran a 12.430 a few weeks ago. The only changes to our car from then to now have been the transmission and converter, installation of a catch can and fixed belt tensioner, and removal of the stock power steering cooler in favor of a small tube and fin unit.
-
10-18-2011, 06:39 AM #29Junior Member

- Join Date
- Oct 2011
- Location
- Oklahoma city
- Posts
- 1
White with GS stripes- 1998 trans am
awesome write up love it im 'TRYING' to pull mine now but with out a lift it is... difficult to say the least im debating on just taking it in and letting the shop drop it for me.
anyways does anyone know if there is a transmission besides the l460e that will fit in there? seems i dont have much luck with them
-
10-18-2011, 05:09 PM #30
You can install TH400 and 4L80E transmissions, however, they both require that the tunnel be "massaged" a bit for them to fit. There will be other issues as well using either of these transmissions in your F-body. Have you tried a built 4L60E?
-
10-18-2011, 06:38 PM #31
Good write up. Nice job with pics.
I remember thinking my stall was in all the way...tried pushing it in 3x. Stood back thinking, "eh, that's gotta be good. eh, one more push."
Clunk, and there she went. Saved myself quite a bit of time by checking it one more time
-
10-18-2011, 07:08 PM #32
It would have saved me some time if I had measured the setback on the stock converter before removing it. Never imagined that the instructions would be off like that. Live and learn I guess...
-
10-18-2011, 08:17 PM #33
I didn't read your write up word for word, but a ratcheting wrench is very handy for removing/installing dipstick bolt.
-
02-08-2014, 03:31 PM #34
I am a new member and just want to say how helpful this forum was in pulling out my bad transmission. I hate to say putting it back in was time consuming on jack stands and no trans jack yet, I got it all done. Thank to the instructions provided. Great work!

-
02-09-2014, 05:47 AM #35
Glad to hear that we could help out. What went bad on yours?
BTW: Welcome to the site!
Thread Information
Users Browsing this Thread
There are currently 1 users browsing this thread. (0 members and 1 guests)
Similar Threads
-
Transmission Removal Tips
By rc74racer in forum GTOReplies: 9Last Post: 02-06-2012, 08:39 AM -
Help: Manual Transmission Removal (hints-etc)
By TerribleTed in forum Manual TransmissionReplies: 1Last Post: 02-22-2011, 10:19 AM -
Removing The Engine From A C5 Corvette - Removal Procedures Part: 1
By Ed Blown Vert in forum CorvetteReplies: 0Last Post: 09-29-2007, 07:50 AM -
2000 T/A, Ram Air.. T-56 Transmission Removal?
By SteelmanLS1 in forum External EngineReplies: 2Last Post: 08-11-2007, 02:04 PM -
Engine and Transmission Removal ??
By Trouble maker in forum General HelpReplies: 2Last Post: 04-18-2007, 08:27 PM


 Reply With Quote

Bookmarks