
Results 21 to 36 of 36
Thread: Header Install
-
06-22-2009, 12:04 PM #21King 0f n00bz


- Join Date
- Jan 2006
- Location
- Shepherd, Michigan
- Age
- 36
- Posts
- 11,770
blacker than wesleysnipes- 98' trans am


i'll add..for my car (98 trans am a4) using qtp long tubes..i had to remove the oil pan drain plug and the filter to get clearance on the driver side..i also removed the metal heat shielding off of the motor mount too..after that..it was very easy
-
06-22-2009, 07:17 PM #22Senior Member

- Join Date
- Oct 2007
- Location
- The 717
- Age
- 36
- Posts
- 2,471
Red- 2001 Trash Can
Holy hell, I just had to pull out the dipstick tube and "massage" the floorboard on the driver's side Originally Posted by shady milkman

-
06-23-2009, 06:09 AM #23King 0f n00bz
- Join Date
- Jan 2006
- Location
- Shepherd, Michigan
- Age
- 36
- Posts
- 11,770
blacker than wesleysnipes- 98' trans am
the dipstick is on the passenger side Originally Posted by 01ws6er
-
06-23-2009, 06:10 AM #24King 0f n00bz
- Join Date
- Jan 2006
- Location
- Shepherd, Michigan
- Age
- 36
- Posts
- 11,770
blacker than wesleysnipes- 98' trans am
it wasn't much at all Originally Posted by 01ws6er
-
06-23-2009, 02:23 PM #25Senior Member
- Join Date
- Oct 2007
- Location
- The 717
- Age
- 36
- Posts
- 2,471
Red- 2001 Trash Can
should have used a comma... I pulled out the dipstick tube, and "massaged" the floorboard on the drivers side. Originally Posted by shady milkman
-
06-23-2009, 06:24 PM #26That guy

- Join Date
- Nov 2007
- Location
- SoDak
- Posts
- 892
White over Red- 1991 Suburban
Send me a picture and I could give you a better idea. I removed all my A.I.R.
-
06-23-2009, 06:42 PM #27Something Diabolical...

- Join Date
- May 2007
- Location
- Houston, Texas
- Posts
- 2,677
- 2000 C5 Torch Red
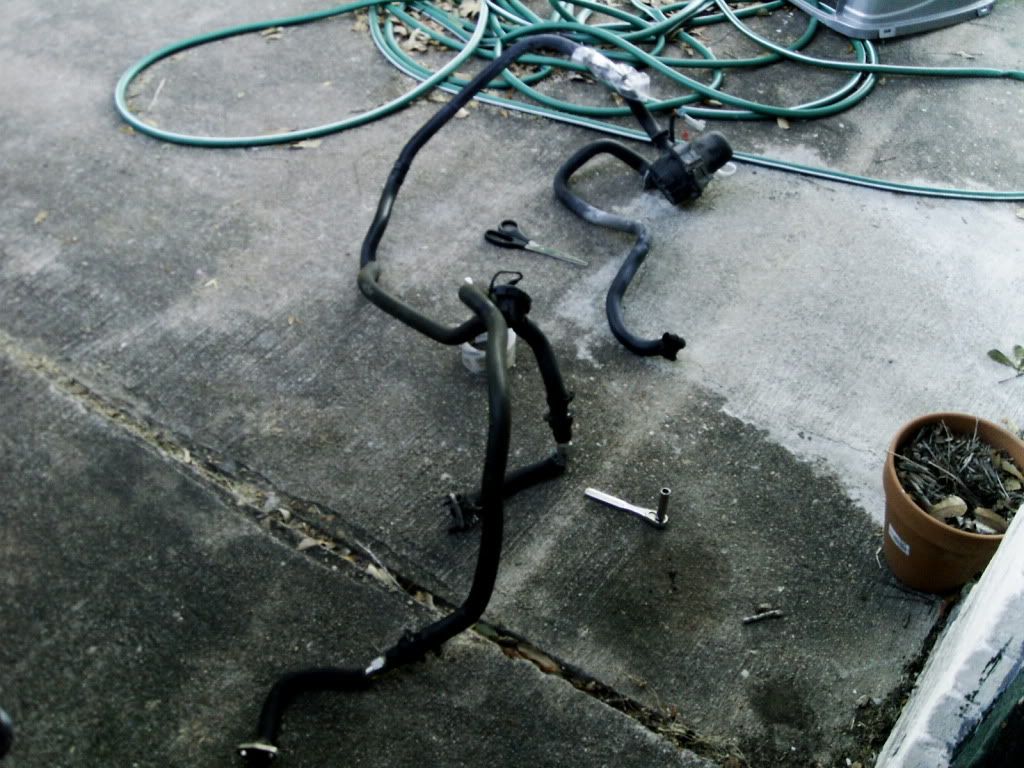
Looks kinda like this. Lol... There was a small wire on the driver side zip tied to the hose running to the back. Looks like it went into the firewall, so I left it alone.
-
06-23-2009, 07:21 PM #28That guy
- Join Date
- Nov 2007
- Location
- SoDak
- Posts
- 892
White over Red- 1991 Suburban
Looks like you got it all.
-
07-10-2009, 08:13 PM #29Something Diabolical...
- Join Date
- May 2007
- Location
- Houston, Texas
- Posts
- 2,677
- 2000 C5 Torch Red
Would like to start up a technical post on long tube header install. I see allot of people that have bought headers recently (including myself) and are wary about installing them.
I’ve tried to take the best photos I have, but please excuse if the photos are dark, most of my work was done in the garage at nighttime with the doors closed and my cheap camera tends to blur if I try to toy with the settings.
Tools
* Floor jack - at least 20" of lift. 18” is bare minimum, but not recommended
* 4 Jack Stands - at least 20"
* ratchet - 8mm for battery: 10mm for coil pack bolts and header bolts: 8mm (deep) and 13mm (deep) for leads to starter and 13mm (deep) for starter bolts: 15mm for dipstick tube and exhaust plumbing: 5/8" spark plug socket
* wrenches - 10mm ratcheting wrench for last bolt on each side of coil pack holders: 7/8" or 22mm wrench to remove 02 sensors.(then throw that damn bolt away)
* PB Penetrating lube
* Anti-Seize – buy a big bottle. Keep it around.
* Soft blanket or fender mat – protect your car paint from scuffs while leaning into your engine bay.
* A friend to help!!! I’ve heard of people doing this themselves and I did all but line up the gaskets on the headers by myself. Don’t be stupid like me.
Optional Tools
SAWZALL – if your having problems with your bolts from the flanges on the y-pipe people have referenced to cut it.
Benzomatic Torch – stubborn bolts
parts
* Headers - Your choice. I used the Pacesetter ceramic coated
* Y-pipe – referenced here is the TSP catted Y-pipe. PITA
*exhaust clamps – Your Y-pipe should come with new clamps, verify.
PLEASE… Don’t use the u-bolt style exhaust clamps. Get band clamps
* GM Header Gasket - new model released PN 12617944 $21 each (GMPartsDirect has them for ~$9.80 ea)
DO NOT USE PAPER GASKET SUPPLIED
optional parts
* Corvette 02 sensors - Rear 2001 Corvette 02 Sensors Bosch PN 13111 (square end connectors) $69.99 ea.
Just noticed it looks like our front 02's are the square pin connectors which would be the rear corvette 02's
* 98-02 02 sims - $99.99 pair (ouch)
* 02 extensions - 2 24" square 4-pin extensions PN O2EXT12 ~$30
* Stage 8 locking header bolts - $37.99
* 98-00 EGR Block off Plate - $9 ea
* 98-02 Air block off plate & gaskets - Pair $12
* Spark plugs – If you haven’t changed Plugs before, now IS the time to do it.
* Spark plug wires – ditto
* Motor mounts – some change while they’re in there
food for thought
-Corvette 02's you can get from any major parts store, or you can get the extenders but just one or the other.
-No sims, get it tuned out in your mail order tune (tunedbyfrost.com $125 for mail order tuning)
-most people re-use their stock gaskets and never have problems, just make sure you DO NOT use the wierd paper gaskets most headers come with because they will burn through.
- plugs and wires
- I will try to list sizes of tools during the install, but probably won’t go into specifics if you should use a shallow socket, deep socket or wrench. I’m hoping you can figure this out on your own.
- Make sure to pretreat your bolts with PB Blaster. Life is so much easier this way.
- I did not list it, but ANTISEIZE all threaded bolts that deal with heat.Last edited by chuckie669; 07-12-2009 at 05:54 AM.
-
07-10-2009, 08:14 PM #30Something Diabolical...
- Join Date
- May 2007
- Location
- Houston, Texas
- Posts
- 2,677
- 2000 C5 Torch Red
Install
- NOTE - Before starting, make sure you have all your parts and tools, test fit anything such as y-pipe to verify fitment. You don’t want to be stuck with a part that doesn’t fit.
- Remove negative battery cable (or both if u wanna).
- Jack the car up and put it on stands or lift if your lucky enough. I did the whole install with only 18” of lift, but made for a very unpleasant experience on my back (sure that’s how my first gf felt).
- OPTIONAL - Remove 13mm bolts holding starter in place and carefully wiggle it free. Then remove the 8mm nut holding lead to ignition and 13mm nut and power wire and remove starter. I didn’t follow this step and it was a non-issue for me.
- Take apart anything that might be in your way in the engine bay. I removed my Fuel Rail Covers.
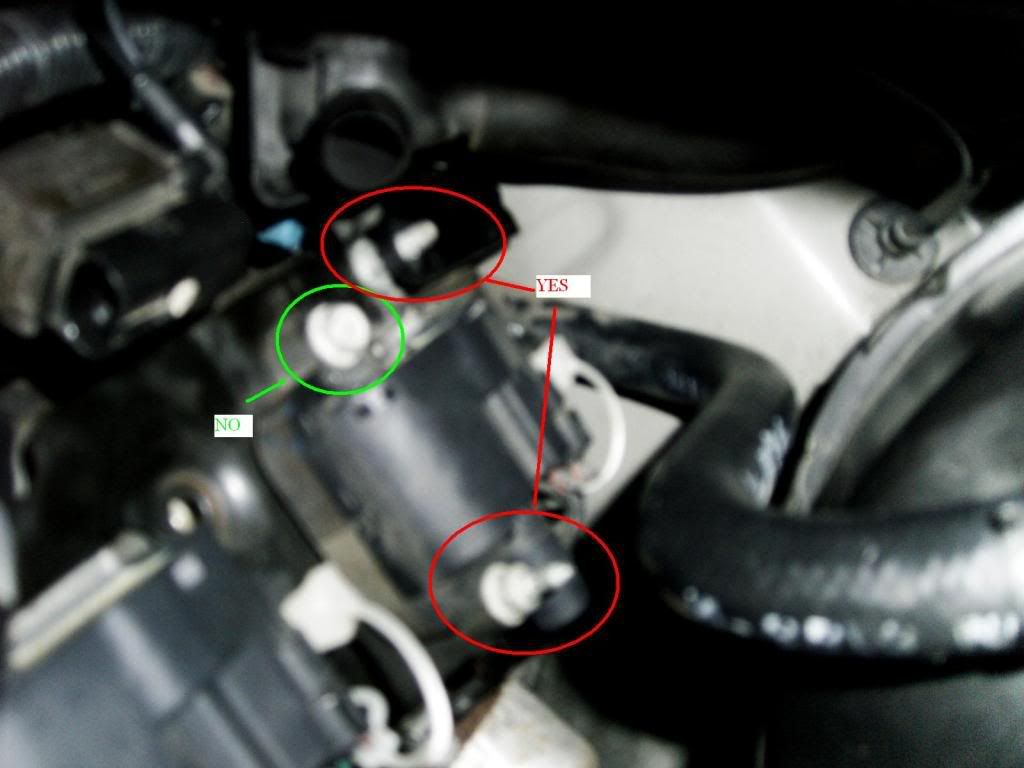
- Remove AIR provisions from your manifold using 10mm ratchet and good extensions. Once off I used a flathead screwdriver to remove the metal AIR pipe from the hose.
Time to go under the car…
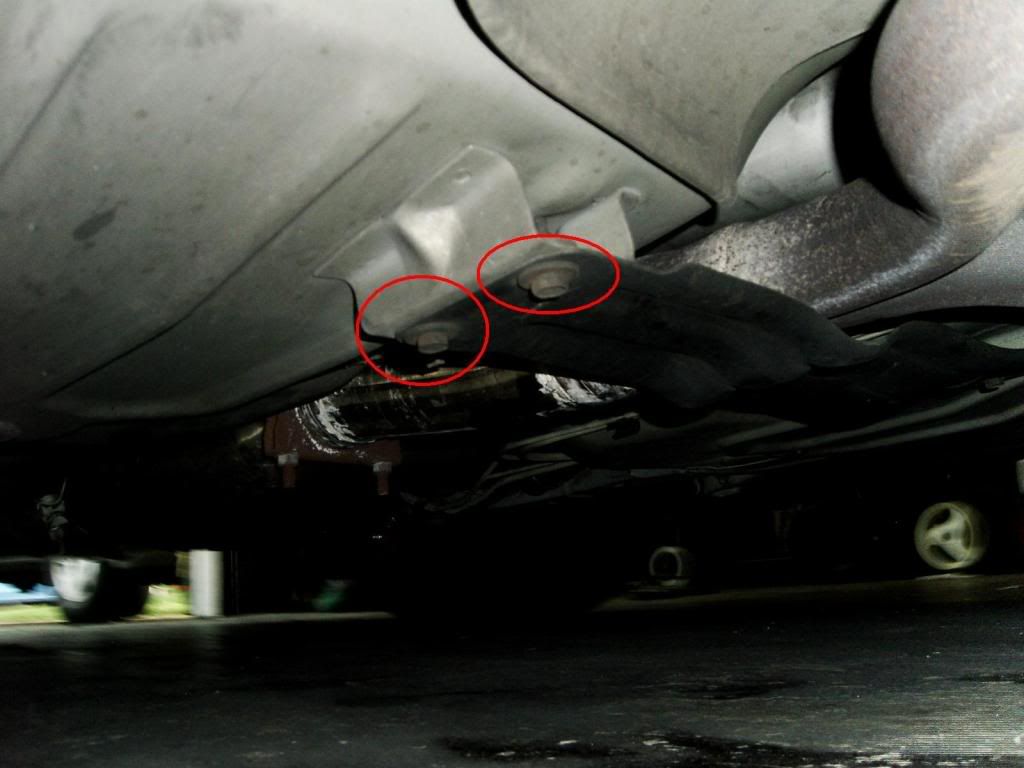
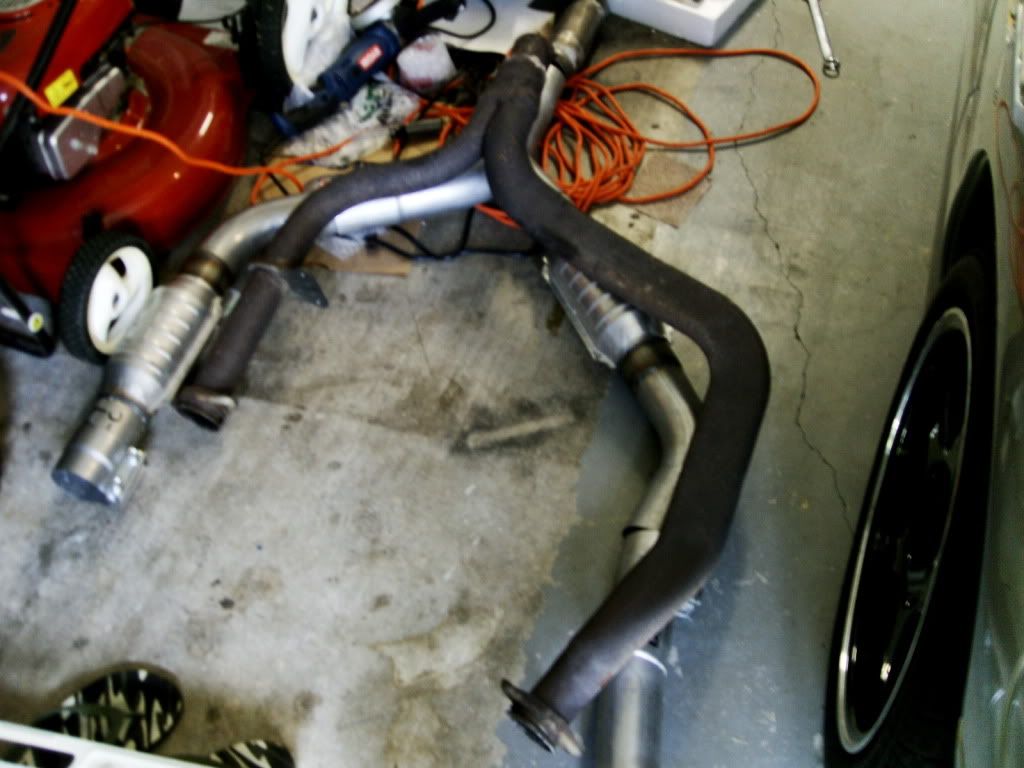
- Remove the four bolts holding the cross brace that sits right underneath your Y-pipe 15mm if I recall. My new 3” Y-pipe didn’t clear so I left it off. Others have shimmed and reinstalled it after
- Now it’s time to remove the stock Y-pipe using a 15mm ratchet and some brute force. (Aren’t you glad you used pbblaster now). The flange piece that molds to the cats was the hardest part here.
- OPTIONAL – Some people have cut theirs off with a sawzall.
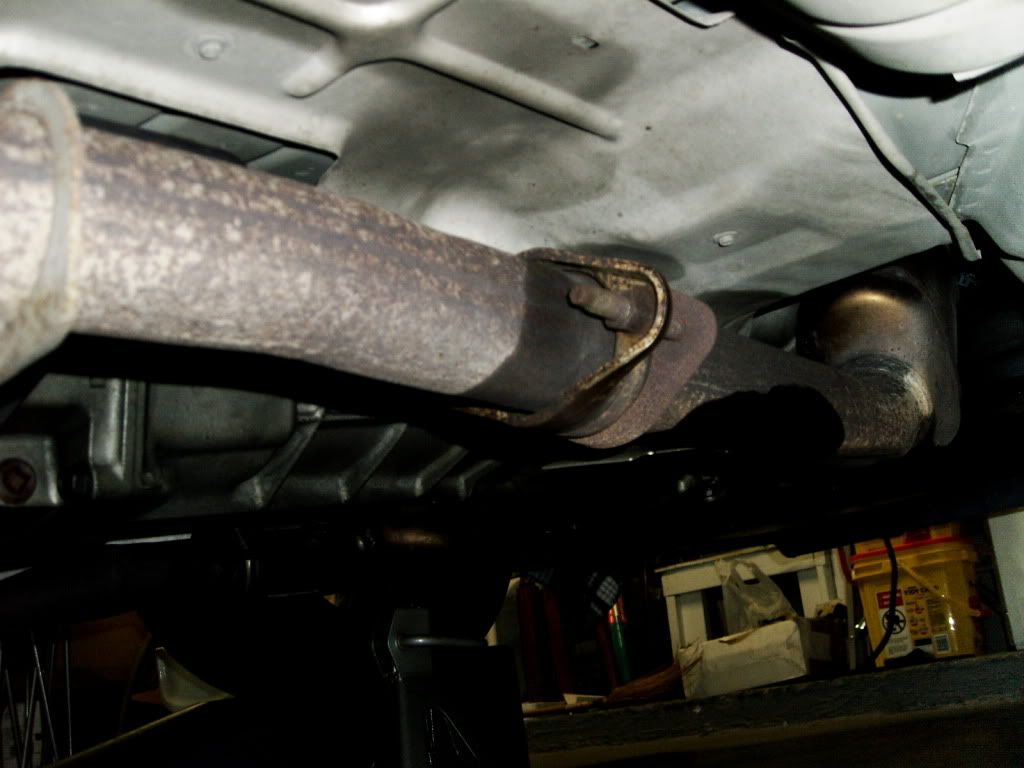
- After you loosened the Y-pipe from the cats, go ahead and remove any extra clamps or mounts holding the Y-pipe in.
- Now you should be able to gently remove the stock Y-pipe and get it out of your way.
- Remove your 02 sensor connections from the car.
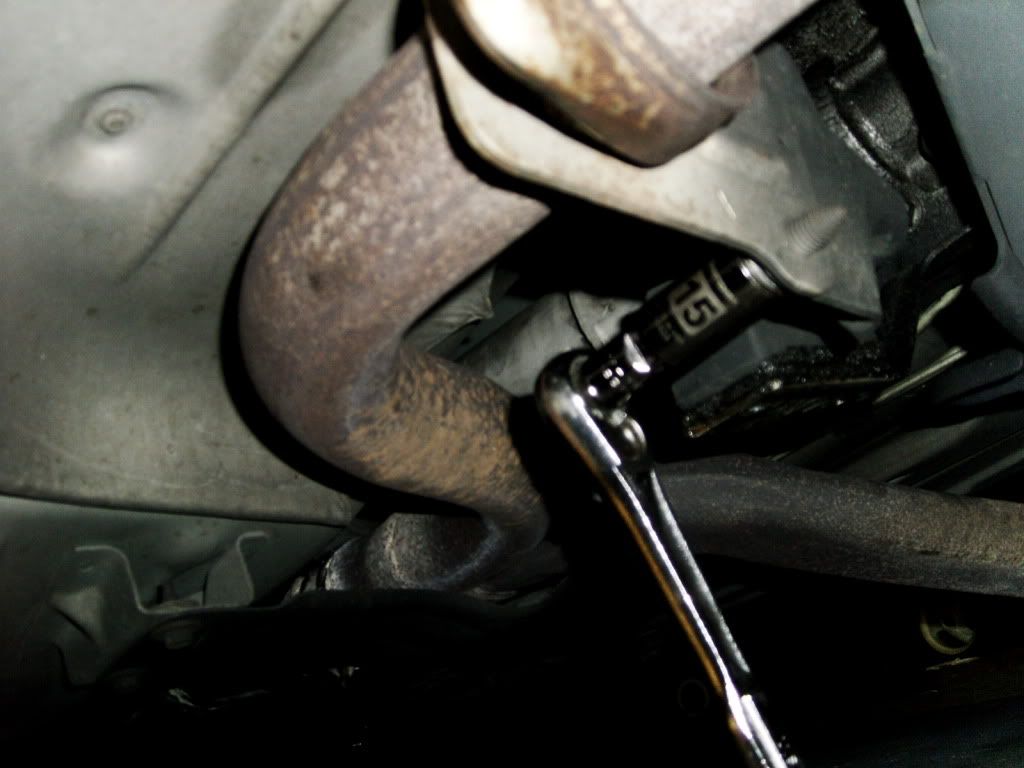
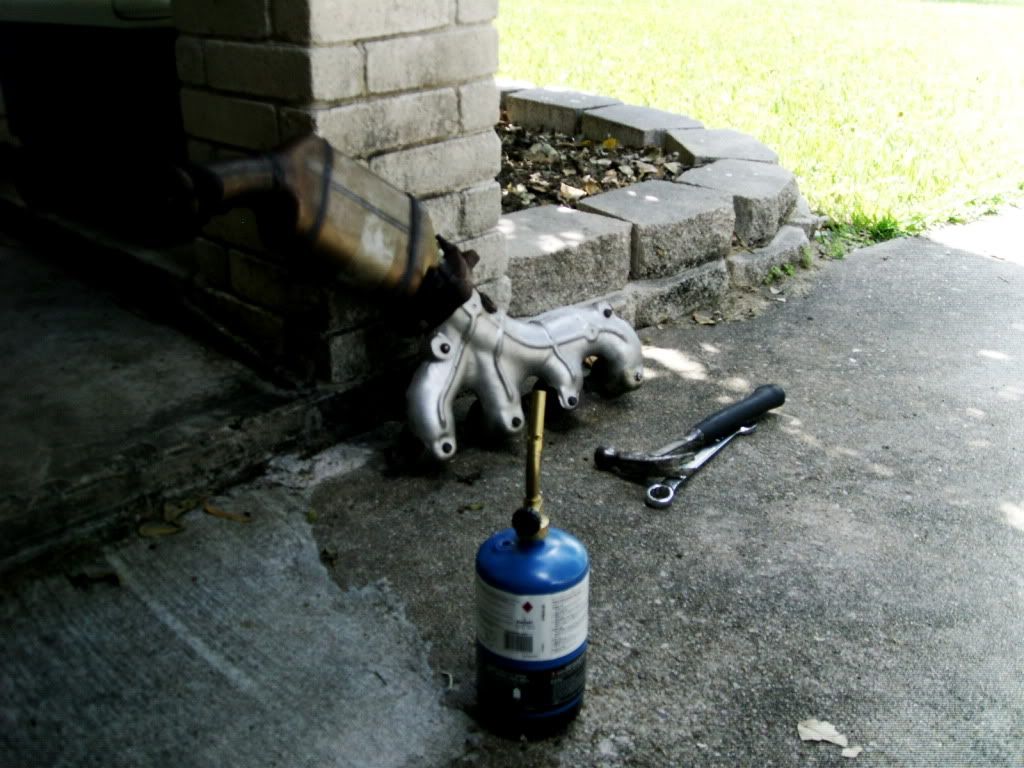
- OPTIONAL - If you plan on reusing your 02’s, I would now go and using the 7/8’s wrench take them out. Mine were near impossible and I was only able to remove one out of four. I later took a benzo torch and heated them up (about 5-8 seconds) where the 02’s meet with the piping. They popped right off without any effort. Otherwise, you can leave them in the cats.
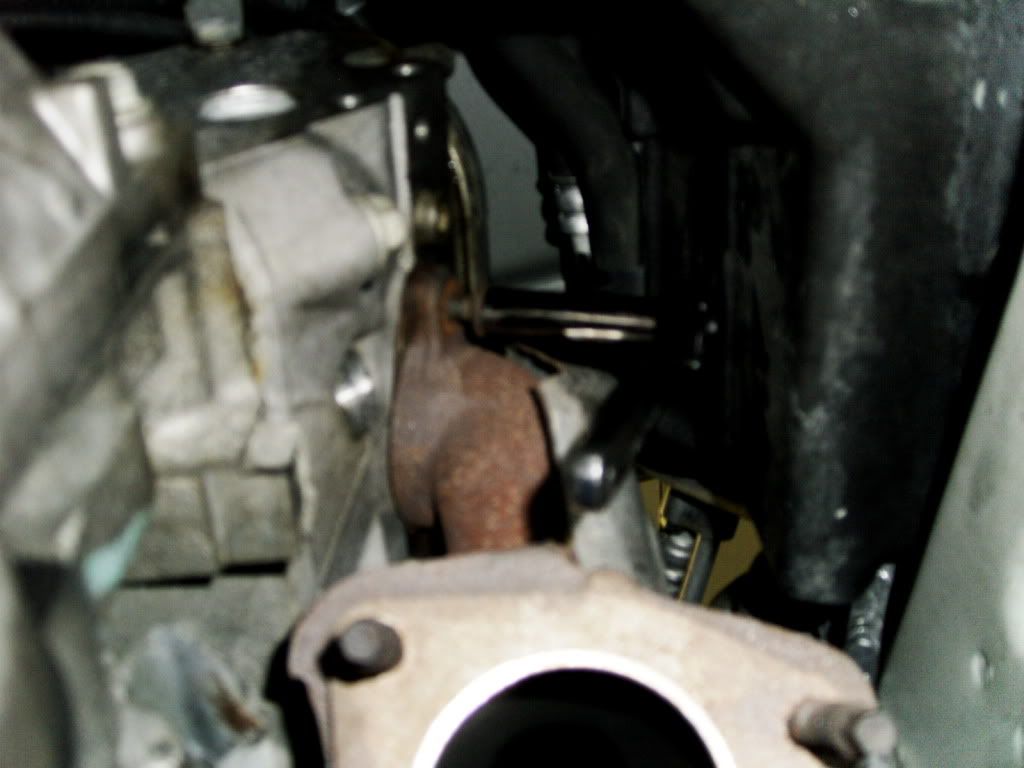
- Now remove your catalytic converters using the same 15mm wrench. You may need some extensions, and definitely a lot of oomph to get these off. Try pb blasting again if your having trouble. I was able to get my driver side off, but left the passenger cat attached to the header and removed without a problem (later separated by benzo torch)
Now we can go back into the engine bay…
Throw a blanket or fender mat over your fender for whichever side you are working on. You don’t want your clothes scuffing/scratching your paint while your upgrading your car. Might also need a small stepping stool (or if your like TS|S, a ladder).
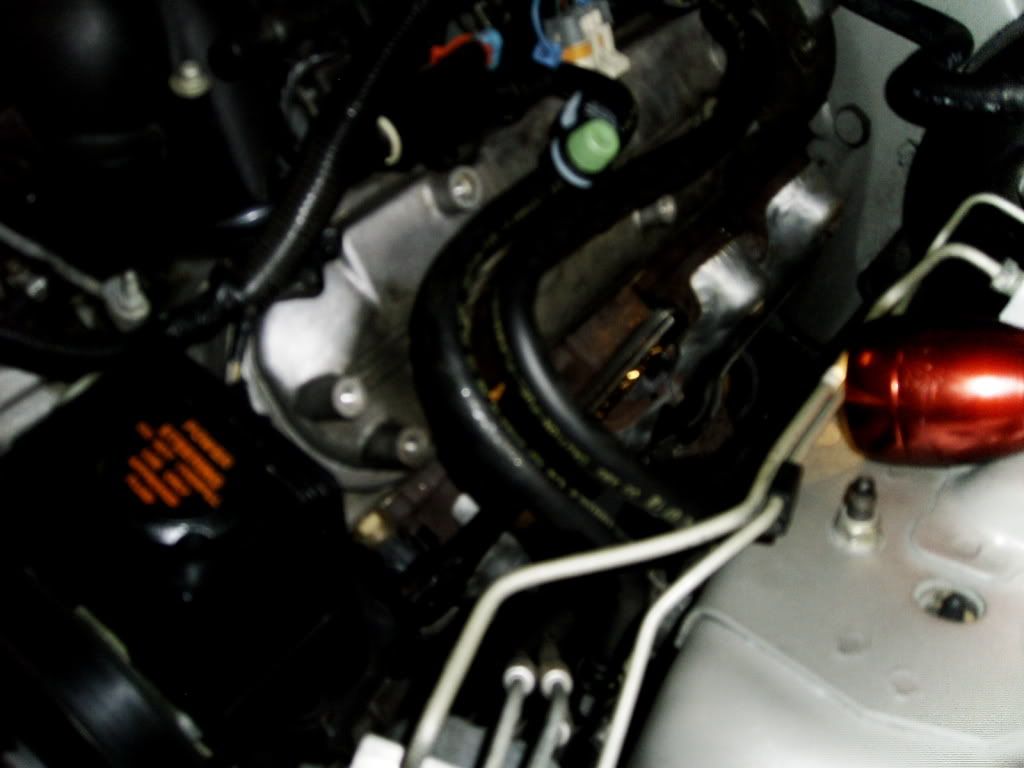
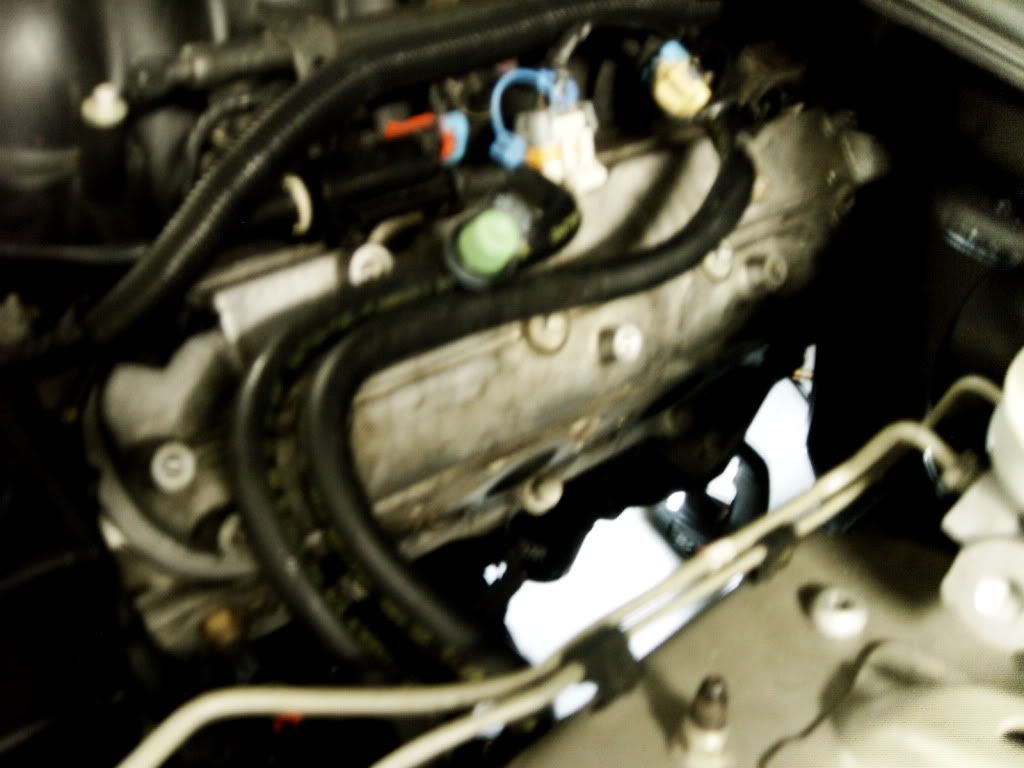
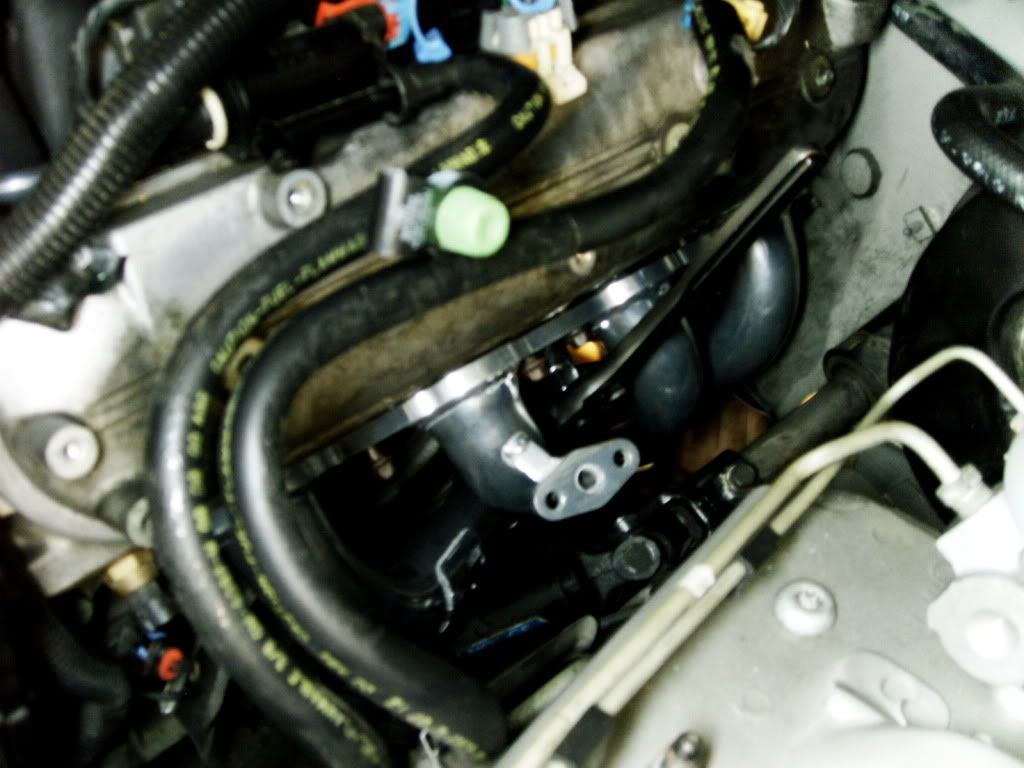
-Remove the 10 bolts from the coil pack assembly (5 on each side) using a 10mm deep socket or ratcheting wrench (99-02 cars, 98 cars will have to remove them one by one) . They look like a basic 10mm bolt with a long point top. You will start thinking how easy this is, but when you hit the 5th bolt, they get pretty unpleasant. You don’t have to put that one back when you’re done. Driver side had an extra bolt holding my AIR provision piece in place also. Also, remove the wiring harness before removing.
I’ve previously done a spark plug install and did NOT put the #5 back one back onto the coil packs. Made life much easier for this install.
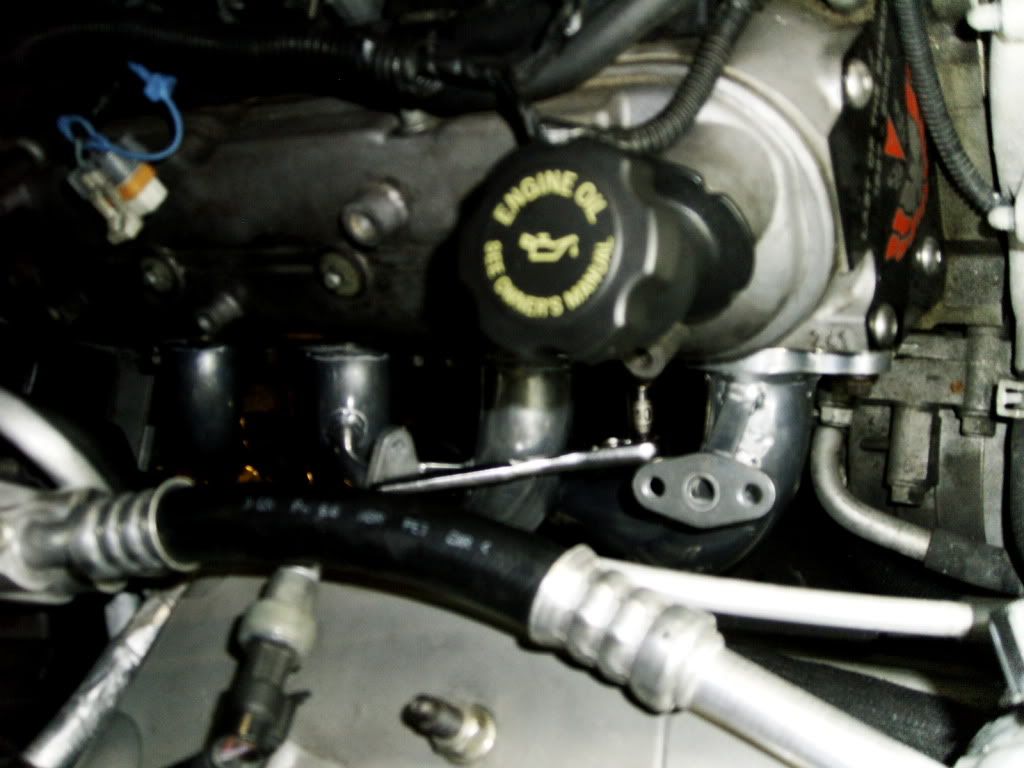
-Remove dipstick tube by unbolting 15mm bolt that holds the bracket to the head. Before just lifting it out, go back under and follow the tube down to know how it sits in the block for reinstall later.
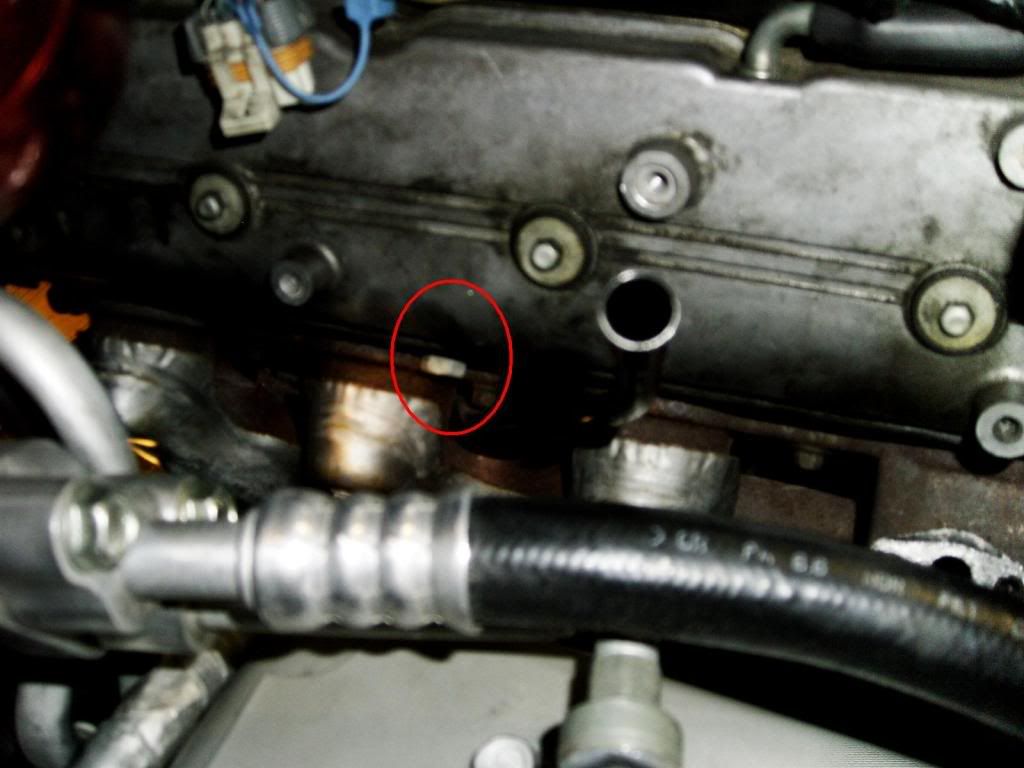
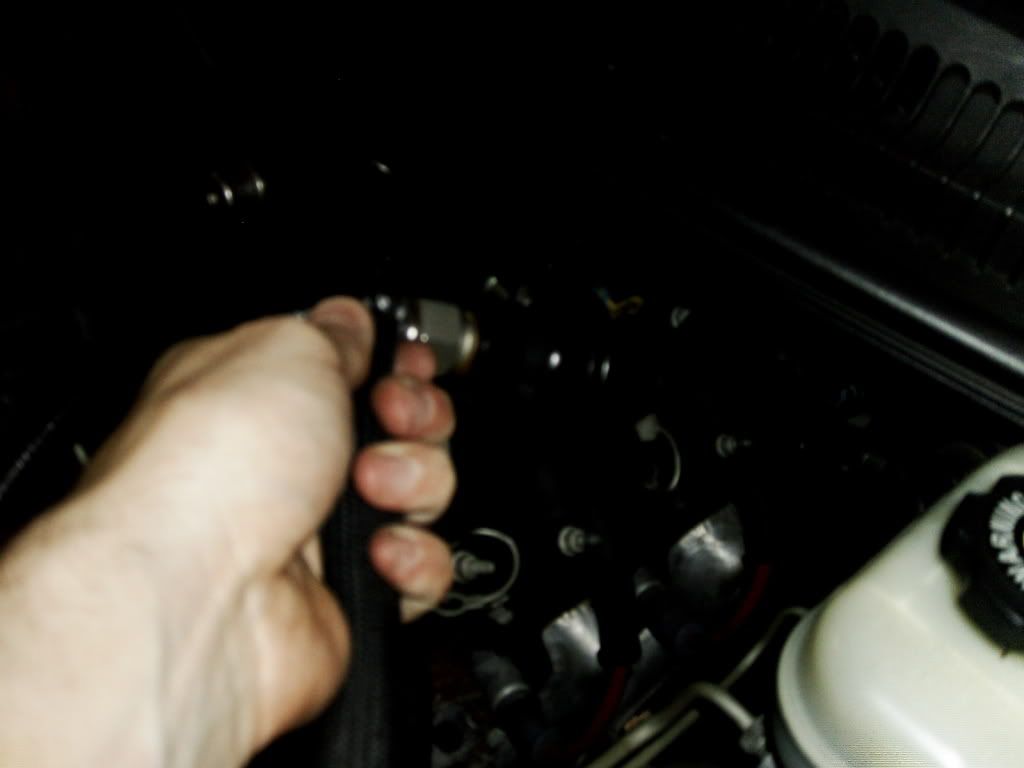
Time for the dreaded spark plug removal. At this point, this should be super easy with the exhaust and emissions removed. (pic is removing #8)
- Remove the spark plug wires using the 5/8’s plug socket. With everything removed you should be able to get all eight from either the top or bottom with basic ratchet, socket and a single extension. (DAMN… It wasn’t that easy my first time).
- Hopefully you have a friend handy now. Remove the six header bolts 10mm carefully and you can slide the header down and out. Take the gasket and bolts and put them somewhere safely if you plan on reusing.
You should now have all of your old crap out and those shiny parts that have been calling to you can come out of the corner now.
- OPTIONAL - If you plan on doing motor mounts, now would be the time. Go find that thread and come back here when you’re done.
Using new gasket and header bolts or reusing stockers go to the next step.
- The passenger side header should slide in with minimal effort. You will either want a jack or a friend holding the header steady while you line up the gasket and put in the bolts. Rethread the bolts starting in the center and work your way out evenly. Torque to 11 ft lbs starting in the center and work your way out evenly. Then go back over at 18 ft lbs. Don’t forget ant seize
Driver side can be quite a bit more effort
- Gently slide it the header up and keep an eye for clearances. If god has blessed you, it will slide in. If your mortal like the rest of us, you will need to take some additional steps. Find where the problem is and the following are the typical solutions I’ve heard of.:
- With the new motor mounts, the problem may be solved
- Some will remove the DS motor mount bolts and slightly jack the motor to allow the header to slide in.
- Some remove the Trans mount bolt and lift the rear of the trans up and the header slides right in (automatic cars?)
- Some have had to grind the K-member back slightly
- Massaging the firewall
- Some have had to Remove oil pan drain plug and oil filter
Mine was catching on the firewall and K member. I tried “massaging the firewall slightly where it was catching. I still had an issue and shaved the K-member back slightly and after another test fitting hammered back a lip that was catching the back tab on the firewall. Header went in without any more grief.
- Same as passenger side. Slide in and line up the gasket, work from center out and torque to 11 ft lbs then 18 ft lbs. Don’t forget ant seize
- Reinstall your existing or new spark plugs now and snug up. Don’t forget ant seize
- Put your stock or new wires onto the plugs
- Reinstall your AIR provisions or install the block off plates now.
- Put your coil packs back on and snug up bolts Remember that #5 bolt? Put him in a Ziploc back and keep with all your other T/A keepsakes for a rainy day. Then reattach the plug wires to the coils. For first two days I only put two of the bolts on because I was going to pull and recheck all my bolts.
- Go back under your car and either put the stock 02’s with extension or corvette 02’s on now.
- OPTIONAL – start up the car and giggle like a little girl…..
- Y-pipe install might vary, but basically test fit and then install. Leave everything loose until you have it how you like. Then tighten everything back up. (check out the difference between stock and TSP
- OPTIONAL – finish removing AIR System
- Go back over and make sure that you have reattached all your wiring harness (around coil packs, 02’s)
Time for a tune now!!!
Contributors
THANKS,
01ws6er
Noscamaro
02transamce
patrik
Special Thanks to the arborbarbor!!! Great guyLast edited by chuckie669; 07-10-2009 at 08:18 PM.
-
07-10-2009, 08:16 PM #31Something Diabolical...
- Join Date
- May 2007
- Location
- Houston, Texas
- Posts
- 2,677
- 2000 C5 Torch Red
Y2KPEWTERSS,
Can you combine post 30 and 31 and delete/replace the original post.
Also, clean up anything in the thread you deem necessary.
If I missed anything, people please feel free to comment so it can be corrected. Did this today with a 3month old screaming in my ear, so it's possible.
-
07-13-2009, 03:41 AM #32Something Diabolical...
- Join Date
- May 2007
- Location
- Houston, Texas
- Posts
- 2,677
- 2000 C5 Torch Red
closed. couldnt move writeup to beginning due to time, so started a new thread to replace this one.
-
07-13-2009, 04:08 AM #33Junior Member
- Join Date
- May 2008
- Location
- JEDDAH
- Posts
- 13
RED- 1998
Hi i.jost ask is the pacsetter or not
-
07-13-2009, 10:01 AM #34Junior Member
- Join Date
- Jul 2009
- Location
- OKC OK
- Posts
- 7
Black- 2002 Pontiac Trans AM WS6
"Alright guys, Need a little help and I'm sure most everyone that's done headers has had this issue. Trying to test fit the new Pacesetter on the driver side by sliding in from underneath and it gets caught up Looks like I need another half inch to an inch maybe. What did you guys do for the driver side? Options I can think of are to cut the k-member which I'd rather not do initially or unbolt the motor mounts which looks to be a huuge pita. Opinions or suggestions? "
All you have to do is remove the steering linkage it is really easy. There are only 2 easy bolts to remove. A screw driver will pop it out and you will have all the room you need. It is just as easy to put back in with the header installed.
-
07-13-2009, 10:12 AM #35NY Representative

- Join Date
- Aug 2007
- Location
- NeW YoRk
- Posts
- 3,394
Red- 2001 ws6
subscribing for when i do mine, great info
-
07-13-2009, 09:40 PM #36Just me

- Join Date
- Nov 2006
- Location
- Broken Arrow, OK
- Age
- 49
- Posts
- 23,345
Pewter metallic- 2000 Camaro SS
New thread that is starting fresh and it organized.
http://www.ls1.com/forums/showthread.php?t=117548Last edited by Y2KPewterSS; 07-14-2009 at 12:59 PM.

Thread Information
Users Browsing this Thread
There are currently 1 users browsing this thread. (0 members and 1 guests)
Similar Threads
-
Install shop or DIY header install?
By dethinboots in forum External EngineReplies: 7Last Post: 09-24-2011, 06:35 PM -
Post LT header install header issues
By ob02z28 in forum External EngineReplies: 20Last Post: 02-18-2010, 04:10 PM -
header install so cal?
By sscamed in forum External EngineReplies: 0Last Post: 10-26-2008, 11:18 PM -
Header install, other
By Tide in forum GTOReplies: 0Last Post: 03-07-2007, 08:01 AM -
Header install
By linegtdt52 in forum Parts ReviewReplies: 9Last Post: 03-09-2006, 12:05 PM

Bookmarks