write up: How to replace the stock subs with eu700s
Elemental Design's eu 700 6.5" sub woofers; these woofers will adequetly replace the stock subs, and have proven to be a great solution for those looking for big sound with rich lows out of the stock set up and those not intrested in the extra weight of big subs in the hatch.
I wish i shot photos through the whole job. For this, you will need;
_ 2, eu700 dual 4 ohm speakers
_ Speaker wire
_ Sound deadener [2, 12x12 sheets]
_ 1/4" thick foam core and xActo knife
_ 8, self driving steel screws, about 1.5" long
_ power drill
_ fbody wiring diagram http://www.thirdshiftstudios.com/monsoon.zip
Step 1, purchase the dual-4ohm eu700's
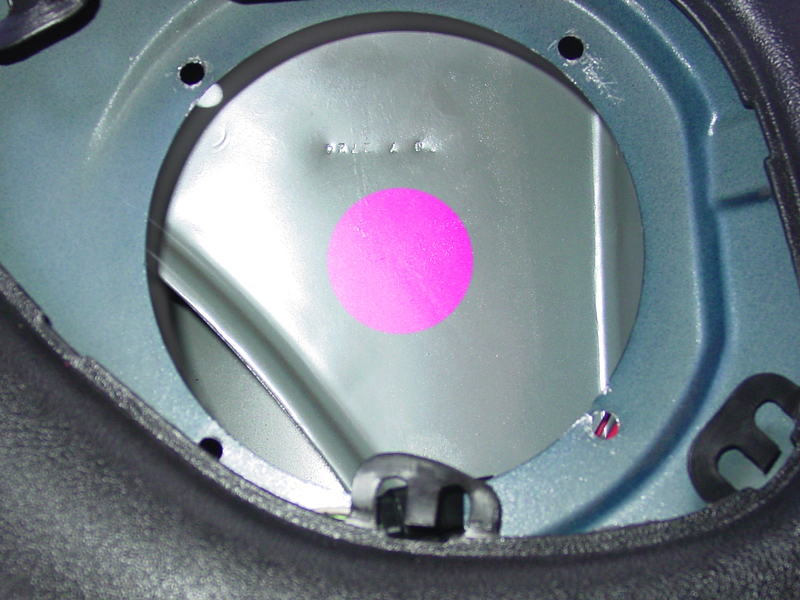
step 2, remove stock monsoons and throw them at zboner :lol: (don't worry about keeping the screws or the little clips that the screws hold on to.) I suggest keepin the little wireing harness.
step 3A, cover the area with sound deadener and cut out a whole where the speaker goes.
step 3B, the eu700s are free air speakers that have a port in the back of them. The port needs to breathe freely or they won't be able to perform. I suggest cutting out a hole in the B-pillar support using a 1.5" bit. This picture marks where to cut:
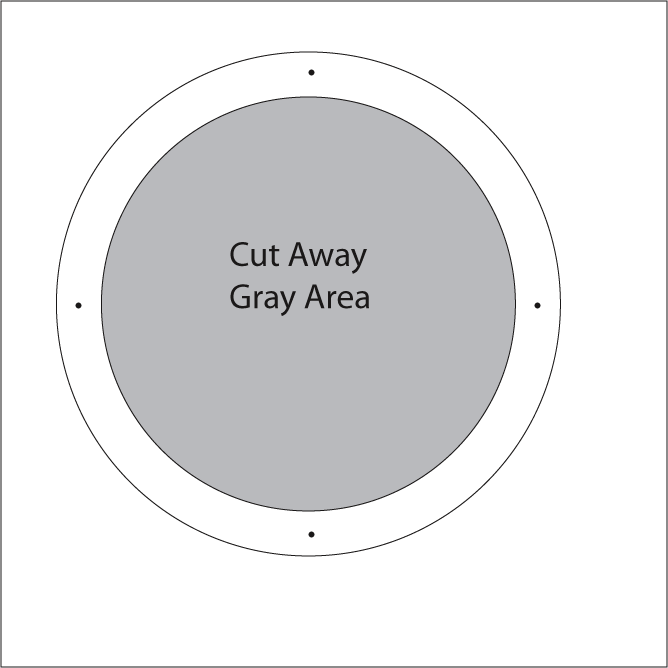
Step 4, the eu700s are very DEEP speakers and will need a spacer to pull them away from the support beam that goes through the B-pilar. Use this diagram to cut out a hole from a 9.25" square of 1/4" foam core
Step 5A, using the wiring diagram that you downloaded, find the positive line for the Left side. Using exta wire, splice the 2 positive terminals together and into the positive line. Now splice the 2 negative terminals together and into the negative line. See the diagram for more help:
http://www.edesignaudio.com/wiring/1dvcparrellel.jpg
Step 5B, repeat for right side. please note: each speaker line will have 2 unused wires, clip them and wrap them with electrical tape so they never contact anything else I don't know what these lead from, but per the wiring diagram, they aren't relevant to powering the speaker.
Step 6, Slide the foam core into place, you might have to pull on the interior panel to allow you access. Make sure the wiring harness is behind the foam core and sets in the little grove at the bottom. Note: the foam will have to be bent/crinked slightly to accomedate the "terrain" of the vehicle's speaker housing
Step 7, CAREFULLY maneuver the speaker into place. Now using the self-driving 1.5" screws, drill the speaker into place until they are firm.
Note: you may have to cut a tab from the bottom of the grill anchors on the interior panel so that it does not rest on the bottom of the speaker's lip.
feel free to contact me regarding anything. I was EXTREMELY pleased with the sound that resulted from this installation. The grills DO NOT rattle as i feared wich was even more pleasing.
